(Part 1 of the bathroom improvements)
(Part 2 of the bathroom improvements)
Today I’m sharing the more involved bathroom improvements we’ve done. These are the kinds of things you probably need your landlord’s permission to do, but it’s worth asking.
Replacing a shower head
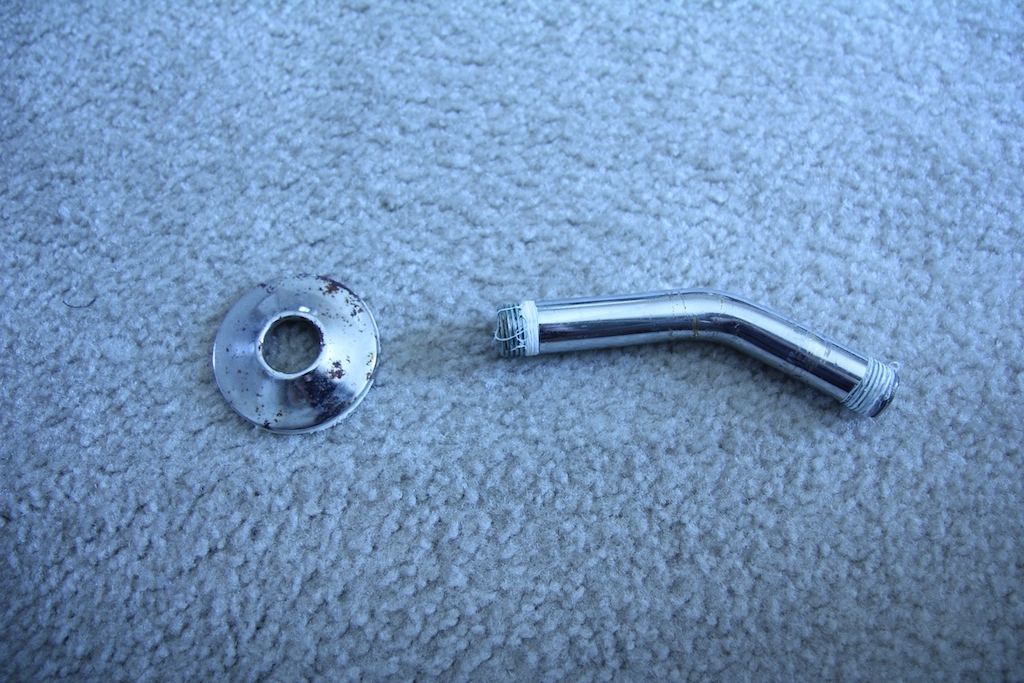
Our shower head was a standard rental blah white plastic type. Actually, at least it was clean, so it didn’t bother me too much. The real problem was its height. It didn’t spray onto your head! It hit me mid-chest, and of course was worse on Mike. So to wash our hair we were angling it way out, making it spray at the far end of the tub and get water everywhere, making a happy camp for a mould colony (more on that soon!) and making puddles that I was incessantly wiping up. Plus, the arm (which leads to the shower head) and the flange against the wall were icky and corroded. Again, they looked dirty even when they were clean!
Dear readers, WE REPLACED IT. I mean, like, did actual plumbing. Now, first, I emailed the apartment office and explained the problem as one of practicality – ‘it’s inconvenient to use and ends up getting water everywhere’. I then said, ‘if you aren’t willing to replace it, can we?’ They weren’t willing (unsurprisingly), but said that we could do it if we wanted. Bingo!
What we found was a new shower arm which has an S-bend shape to add height to a too-low shower head. Most of the plumbing was done by Mike, because it needed strength and courage, and I have less strength and was too busy hiding my face in the bed, just waiting for the inevitable explosion of water leaking through the floor and onto our neighbours below. But after much angst and a few closely-controlled leakage tests, it seemed fine. The next day, I caulked around the flange to seal it to the wall.

We found this Youtube tutorial helpful:
Re-caulking the bathtub
Because we’d been given permission to change the shower head without much fuss, I decided I probably wouldn’t get in trouble for doing some caulk repair.
Icky caulk is one of my pet peeves. If the previous tenant hasn’t been scrupulous about cleaning, there’s already black or brown mould inhabiting the caulk before you get a chance to do anything. So it looks dirty no matter what. Surfaces that look dirty even when you clean them feel like an insult, like the house is just laughing at me. Moreover, caulk of this type is usually peeling off as well, little rubbery ribbons that wiggle around when you scrub them, hold mini pools of water, and harbour even more mouldy hideaways. So not only does cleaning produce no perceptible result, but it’s fiddly and frustrating to do. And you are always tempted to pull those ribbons off…but will that make it better, or worse?!
Here was the situation in the worst corner. See the brown mould? And the sloppy caulk? You might not be able to see the other issue, which is little rubbery bits coming loose.
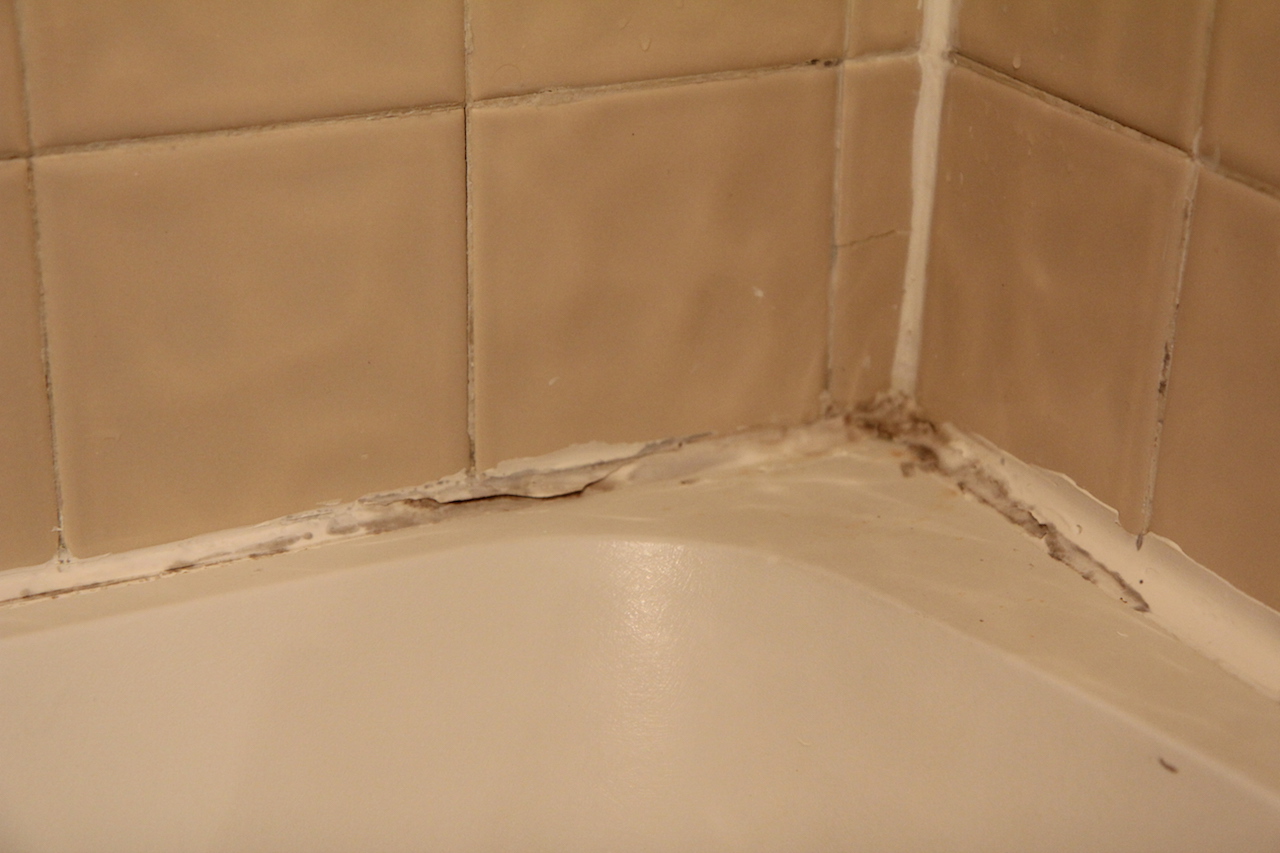
Re-caulking is actually fairly straightforward. You scrape off the old caulk, clean the area, let it dry, and then apply new caulk. I put a towel in the tub and sat in it to do this. Removing the old caulk was the worst – it took me a couple of hours, and I had to go buy a sugary drink from Starbucks afterwards. It was like an archaeological excavation, in which I distinguished about three previous layers of caulk, each hiding their own generation of mould. Obviously it had been caulked over multiple times just for cosmetic purposes.
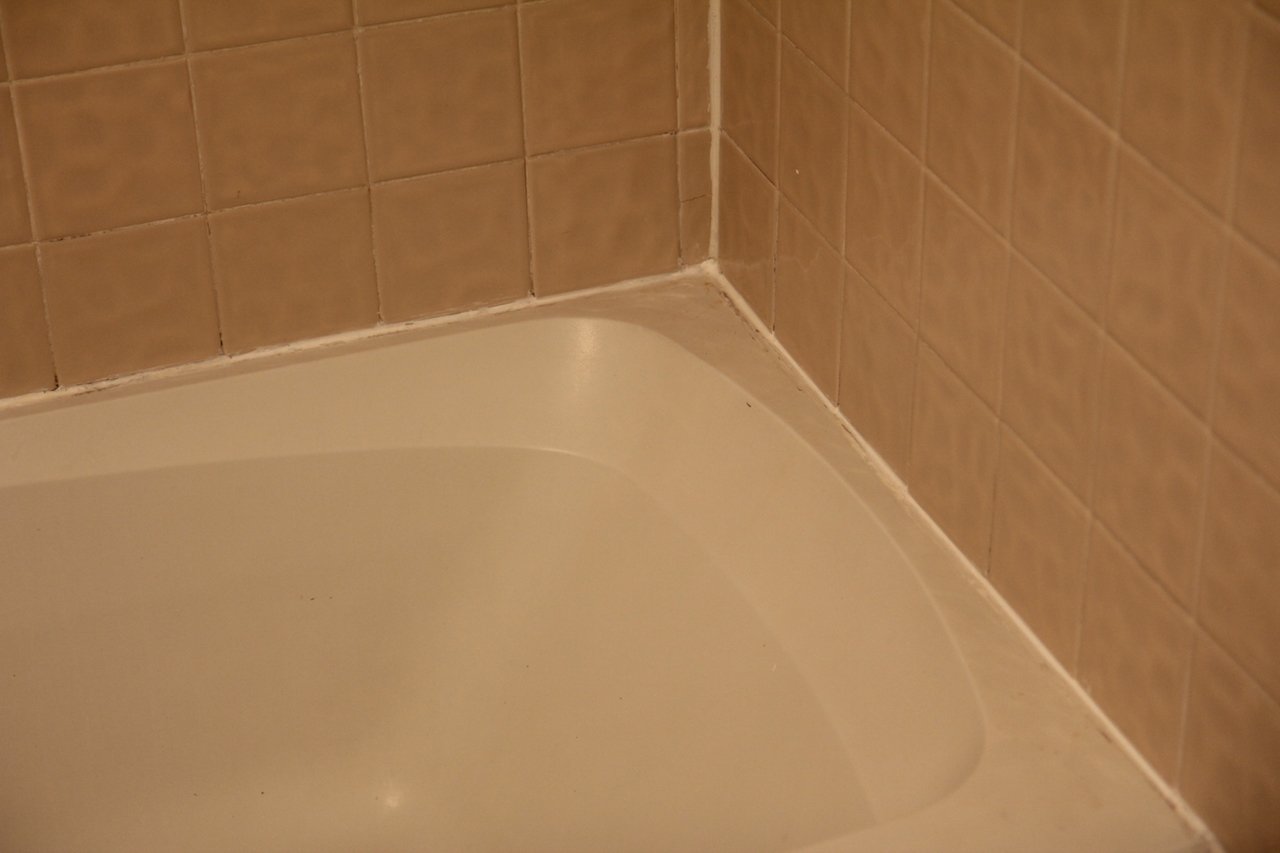
Here is the result! It’s not perfect, and some grime was really impossible to remove. I think that’s life when you’re working with previous people’s shortcuts. However, isn’t it so much better?
(I want to assure you that when caulking, I wore a mask and tried to avoid touching the stuff as much as possible. The baby is being well protected during my DIY!)